[Skip to Main Content]
此站點大量使用JavaScript。
請在您的瀏覽器中%s。
小知識
螢幕截圖
影片
評論
評論來自
Zyland
Phase 1:
Tank
: Hold threat on boss. Kite him out of green puddles when needed. Be prepared to pop cooldowns if needed during
Frenzied Assault
.
Dps
: Stand behind the boss if melee or off the the sides. If you're ranged and need to be in front of the boss for some unknown reason, be at least 10 yard in front of him.
Don't stand in green puddles.
Healer
: Heal people. Even when they stand in green stuff, and even when the tank doesn't pop a cooldown for
Frenzied Assault
, even though his gear isn't good enough not too.
Phase 2 (occurs when boss dies):
One person (doesn't matter who)
: Right click boss to start loot rolls.
Everyone:
Roll only on loot needed for yourself and avoid taking someones main spec gear for your off spec. Congratulate the winner of loot, proceed to not rage quit because you lost an item/your item didn't drop. Continue to next boss, which the tank will pull himself.
***Note***
If you're lazy and jump right off the edge and take massive damage that the healer heals. Thank the healer. Come on now, it's only fair
評論來自
OldWolf2
Challenge Mode:
The
柯克席克破壞者
has 50% as much health as the boss, so it is not economical to kill them. The first one should be chain CC'd the entire fight, and the boss should be burnt so that he either dies before the second one spawns, or shortly after that. The group damage from two non-CC'd Saboteurs will quickly wipe the group.
The tank needs to lead the boss around the rampart, so that the boss does not stand in goo, and also so that melee DPS have room to stand behind the boss without being in goo. The tank should also pick up Swarmers, quite a lot of tank movement is necessary on this fight.
DPS should NOT attack Swarmers. What will happen is that when the boss casts
狂暴襲擊
, the tank steps back just out of range of it, and all the Swarmers will die. The DPS should focus fire on the boss and get him down as fast as possible.
The kite path that we used involved the ranged standing on a fixed spot in the centre of the rampart, so they did not have to move the whole fight; tank kited the boss up one side and down the other (but moving quickly past the ranged spot so that goo was not dropped on it). The goo despawns fairly quickly, so you can do two or three short loops of the course.
If you're not a Gold group, then time warp is best used at the start of this fight before there's too much chaos.
評論來自
Pervy
A heads up for people like me. Use the cannon after defeating Striker Ga'dok. If not the path for Commander Ri'mok is set ablaze. First time tanking, my group and I fought with the fire there. Needless to say the fight is much harder this way.
3D查看
連結
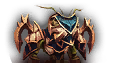
指揮官黎莫克
這個 NPC 能在這些地區找到:
落陽關
.
冒險指南
英雄
傳奇
致命
重要
坦克
輸出
治療
可中断
魔法
詛咒
毒藥
疾病
暴怒
黏稠液體
—指揮官黎莫克週期性地流出一片半徑6碼的液體區域。與這種液體接觸能使黎莫克的傷害提高20%,並使站在其中玩家的傷害每1秒降低20%。此效果可堆疊5次。
狂暴襲擊
—黎莫克釋放一波狂暴襲擊,每0.3秒對長9碼與寬90度的錐形範圍內所有目標造成他50%的普通近戰傷害,持續6秒。
柯克席克螳螂兵
—一波波的增援持續地登上城牆協助指揮官黎莫克。
柯克席克破壞者
—柯克席克破壞者週期性地加入戰鬥。
轟炸
—柯克席克破壞者對周圍丟出一批炸彈,對40碼範圍內的所有敵人造成85500至104500點火焰傷害。
引用 (3)
指揮官黎莫克吼叫:
沒有人能阻擋我們!
指揮官黎莫克吼叫:
誰都別想逃。
指揮官黎莫克吼叫:
關口就快被攻破了!快,殺光這些礙事的傢伙!
收獲
殺死此 NPC 後您可獲得:
英雄
440
點
火金熊貓人
聲望
440
點
土水熊貓人
聲望
普通
440
點
火金熊貓人
聲望
440
點
土水熊貓人
聲望
天尊
440
點
火金熊貓人
聲望
436
點
土水熊貓人
聲望
指南
Gate of the Setting Sun Dungeon Guide: Bosses, Strategy and Loot - MoP Classic
相關
貢獻
在發表評論前,請留心以下提示:
您的評論必須為繁體中文,否則將會被删除。
不知道如何發評論?參考我們的
格式指南
!
發表前最好先自行校對一次。
有問題可以訪問我們的
論壇
來尋求幫助。
發表評論
你没有登錄。
請登錄
或者
註冊帳號
來新增你的評論。
使用下面的表格瀏覽您的截圖。
包含使用者介面要素的截圖通常會被直接拒絕,同樣的,模型檢視器或角色選擇畫面的截圖也是如此。
品質越高越好!
在提交螢幕截圖前, 請檢視我們的
螢幕截圖 指南
!
您没有登錄。請
登錄
後提交截圖。
將影片URL輸入下列表格即可。
URL:
支持:僅限 YouTube
說明:您的影片需通過審核才能在站點上顯示。
我們用
Wowhead 客戶端
保證資料庫的及時更新,向您提供額外的有趣的功能!
兩大目的:
它還維護WoW的一個插件
Wowhead Looter
, 在您遊戲時採集數據!
它將
採集所得數據
上傳至Wowhead,保證資料庫時刻掌握最新信息!
您可以用它追踪完成的任務、配方、坐騎、伙伴寵物以及頭銜!
您還在等什麼?立即
下載客戶端
整裝待發吧!


我們用 Wowhead 客戶端保證資料庫的及時更新,向您提供額外的有趣的功能!
兩大目的:
您可以用它追踪完成的任務、配方、坐騎、伙伴寵物以及頭銜!
您還在等什麼?立即 下載客戶端 整裝待發吧!